Today I’m going to talk to you about images in WebP format. Why? Because I recently had to migrate a server with 100 GB of image files (jpg and png). This is a significant S3 storage cost, it takes a monstrous amount of time to make backups, and for some large files, it destroys the performance of your websites or applications. By the way, the loading time of a web page is taken into account by Google, and a 50 MB image will penalize your SEO.
I looked for a way to reduce the size of all this, and I’ll explain everything.
The WebP file type
The WebP format is developed by Google. It is a format that allows for image compression, or not. Without compression, Google estimates that a PNG image converted to WebP weighs 26% less. WebP works natively with Chrome, Firefox, Edge, Opera, Brave… In fact, I think the list of browsers that do not support WebP in 2025 is almost empty.
WebP images support transparency (like PNG) and animations (like GIF) with more colors.
Please note that Google strongly encourages the conversion to WebP and even favors the appearance of WebP images in Google Images, for example.
How to convert an image to WebP?
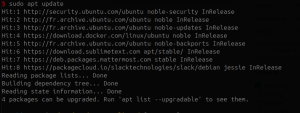
There are tons of free websites that do this. Your favorite search engine will help you find them by typing “jpg to webp” or “png to webp,” for example. Photoshop and image editors like Photopea, GIMP, Krita can also handle the format. On Linux (Debian/Ubuntu), for example, WebP is available in the repositories. To install it, simply copy and paste this command into your terminal:
sudo apt update && sudo apt install webpThen use it as follows:
cwebp vacances.jpg -o vacances.webpAnd if you want to apply compression:
cwebp -q 60 vacances.jpg -o vacances.webpHere, -q 60 specifies the compression rate. The value ranges from 0 to 100 (default is 75), and the smaller the value, the lighter your image will be, at the expense of quality.
Example of converting a photo to WebP
To provide you with clear indicators, I propose some benchmarks that I have conducted myself:
| File Format | Original Size | WebP Without Compression | WebP at 75 | WebP at 60 | WebP at 50 | WebP at 40 |
|---|---|---|---|---|---|---|
| PNG | 10.4 MB | 2.1 MB | 488 KB | 408 KB | 363 KB | 319 KB |
| PNG | 5.5 MB | 1.3 MB | 355 KB | 299 KB | 265 KB | 233 KB |
| JPG | 49 MB | 21 MB | 3 MB | 2 MB | 1.6 MB | 1.3 MB |
I note that the larger the image, the longer the processing time, but for the same image, the lower the rate, the shorter the time. It took me 17 seconds to go from 49 MB to 21 MB (rate 100), but only 4.74 seconds to go to 1.6 MB (rate 50). For the 10.4 MB file, it takes 1.03 seconds at 100 and 0.73 seconds for 40.
And so you can see the detail, here are the two files:
The original (10.4 MB) once sent to WordPress, which processes it, results in a size of 1.4 MB.

And the version with a compression rate of 40 (319 KB), still processed by WordPress, ends up at a final size of 150.2 KB. Do you see a difference? I do: bandwidth and storage cost!

Automating and industrializing file conversion
OK, that’s great when you need to convert a single file! If you have hundreds or thousands (or even more), you’ll need to be clever 😏. I propose a bash script that will scan a given directory (source) and convert each jpg or png file it encounters. The destination of the file can be in the same directory or another, it’s up to you. Here is the script, and I’ll explain how to use it just below 👇
#!/bin/bash

if [ "$#" -ne 2 ]; then
    echo "Usage: $0 <source_directory> <destination_directory>"
    exit 1
fi

SOURCE_DIR="$1"
DEST_DIR="$2"
COMPRESSION=60

if [ ! -d "$SOURCE_DIR" ]; then
    echo "Source directory does not exist: $SOURCE_DIR"
    exit 1
fi

if [ ! -d "$DEST_DIR" ]; then
    echo "Destination directory does not exist: $DEST_DIR"
    mkdir -p "$DEST_DIR"
    if [ $? -ne 0 ]; then
        echo "Unable to create destination directory: $DEST_DIR"
        exit 1
    fi
fi

if [ ! -w "$DEST_DIR" ]; then
    echo "Destination directory is not writable: $DEST_DIR"
    exit 1
fi

for picture in "$SOURCE_DIR"/*; do
    if [[ "$picture" == *.jpg || "$picture" == *.jpeg || "$picture" == *.png ]]; then
        base_name=$(basename "$picture")
        base_name_no_ext="${base_name%.*}"

        cwebp -quiet -q $COMPRESSION "$picture" -o "$DEST_DIR/$base_name_no_ext.webp"

        if [[ $? -ne 0 ]]; then
            echo "ERROR during conversion: $picture"
        else
            echo "Converted: $picture -> $DEST_DIR/$base_name_no_ext.webp"
        fi
    fi
done
And now how does it work? By default, I set the compression rate to 60. This seems to be clean and significant compression. But you can change the 60 in the script to another value between 0 and 100 (remember, 100 = quality but heavier, 0 = degraded quality, but ultra light). The value is on the line: COMPRESSION=60
To use this script, copy and paste it into a text file (with nano, vi, vim, gedit, Text Editor) and save it with a meaningful name like “conversion-webp.sh” (.sh is to indicate to yourself that it’s a script, it doesn’t matter if you include it or not). Make the script executable with the command: chmod +x conversion-webp.sh and run it with a first parameter that will be the directory to scan, then a second parameter that will be the directory where to save the WebP images.
./conversion-webp.sh /data/img/ /data/img-webp/Let it run 🙂
For the record, converting 100 GB of images (111,855 images) took me 6h30, and the WebP folder is 7.6 GB with a compression rate of 60. 92 GB savings, that’s 92.5% storage reduction! It’s also the difference in loading time of your image on the visitor’s browser (or the Google bot).